Showing posts with label knotted cord. Show all posts

Tuesday, May 28, 2013

More Kumihimo

I had been wanting to try a twisted style of a Kumihimo bracelet I had seen in a magazine a while ago but as I am still very new to this technique the written instructions had be a little confused so today I found a tutorial video on youtube which really helped!


And this is how it turned out. I'm really happy with it. Again I have used the fold over cord ends to finish this bracelet. Its just something I have and am comfortable using at the moment but will be hopefully getting a whole lot of new Kumihimo supplies soon now that I have grasped the basics and like it so much!


I can't wait to try even more colour styles and soon I'm going to even try a beaded Kumihimo bracelet! But for now I have added this onto the same clasp with a few of my other bracelets to wear together!


I have loved trying this new technique and can see myself continuing to use it in my jewellery making. If its something you haven't tried before I would recommend a try at it and see how you get on. There are plenty of youtube videos and instructions online to help you and once you grasp the basics your away! Let me know below if you have tried Kumihimo and weather its a technique you like or not!

Friday, May 10, 2013

Diamond Pattern Friendship Bracelet Tutorial


I can't remember where I got the pattern for this bracelet I've tried out quite a few and then tweaked them a little to make them easier to remember and explain in this tutorial. The tutorial is broken down into three parts - the left triangle, the right triangle and the diamond.

I would recommend you try my tutorials for the Simple Friendship Bracelet or the Chevron Pattern Friendship Bracelet before trying this one to get a bit of practice doing the forward and backwards knots.

Always remember a forward knot always ends up to the left of the string you are knotting over and a backwards knot always ends up to the right of the string you are knotting over.
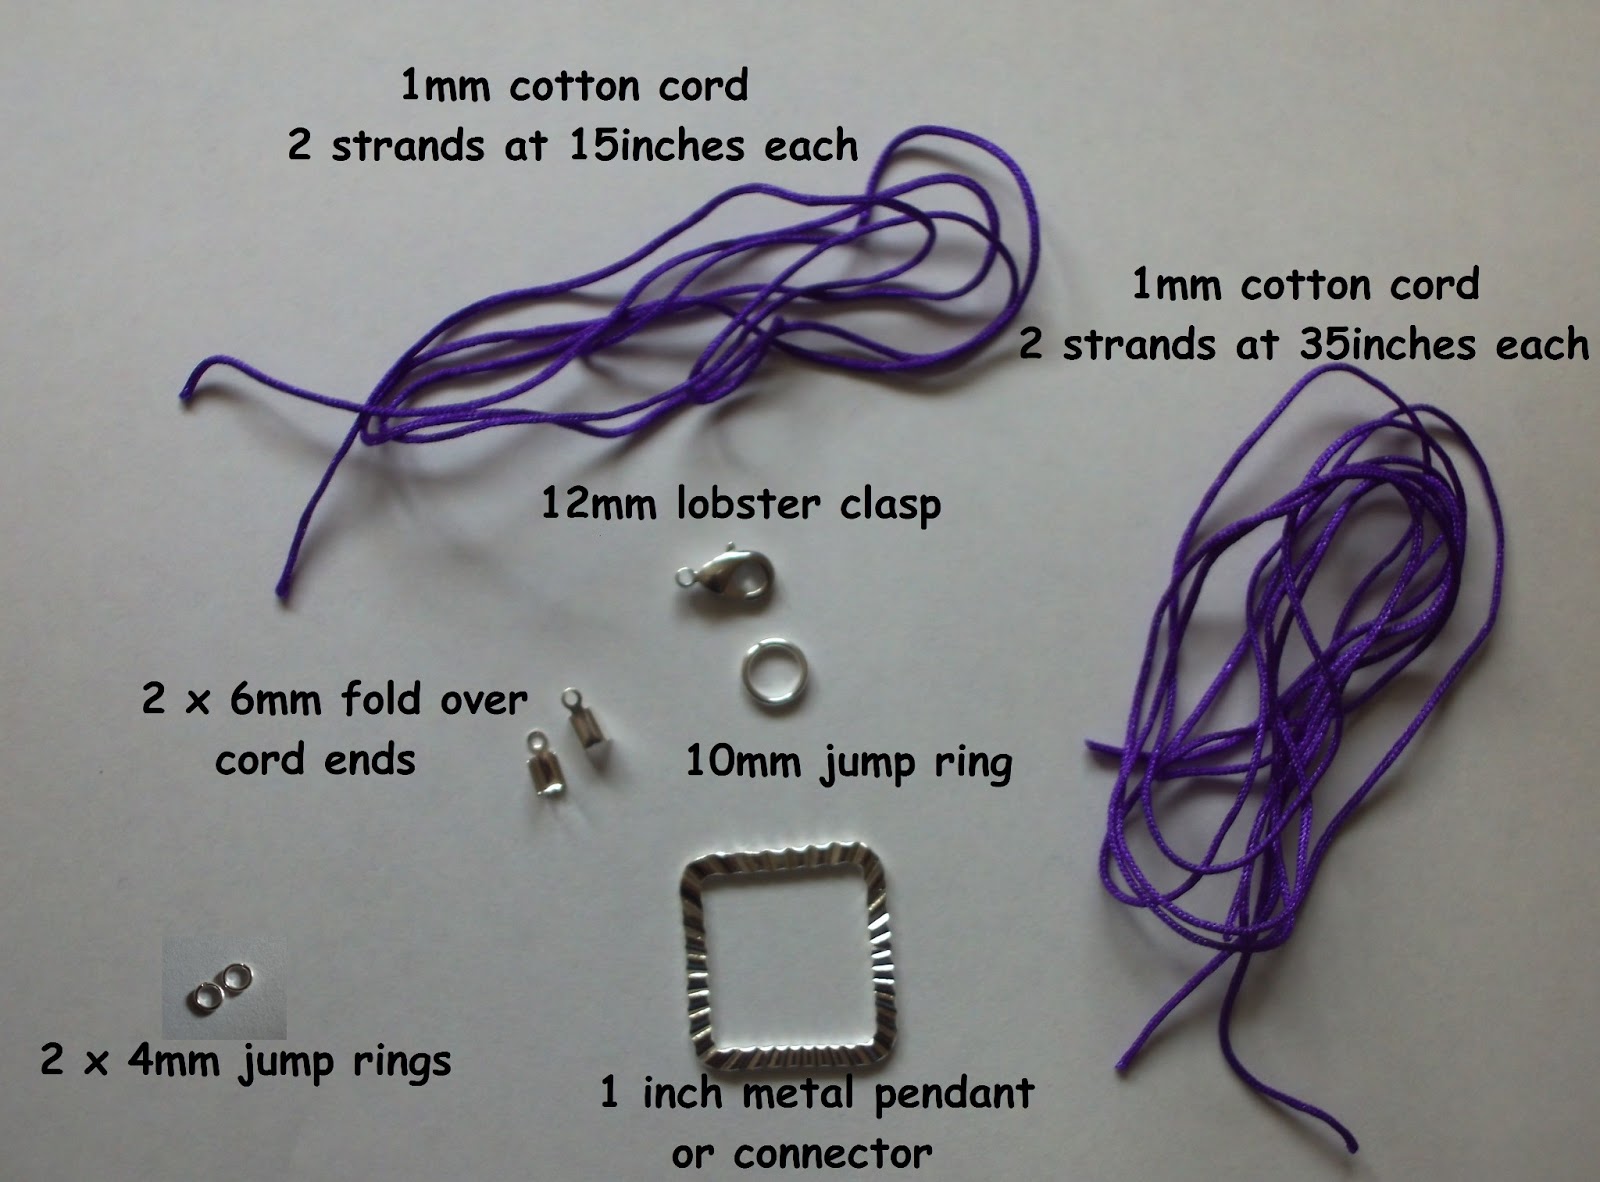

What You Need:

3 x different colours of emboirdery thread

A clasp

2 x fold-over type cord ends

2 x 4mm jump rings (not pictured)


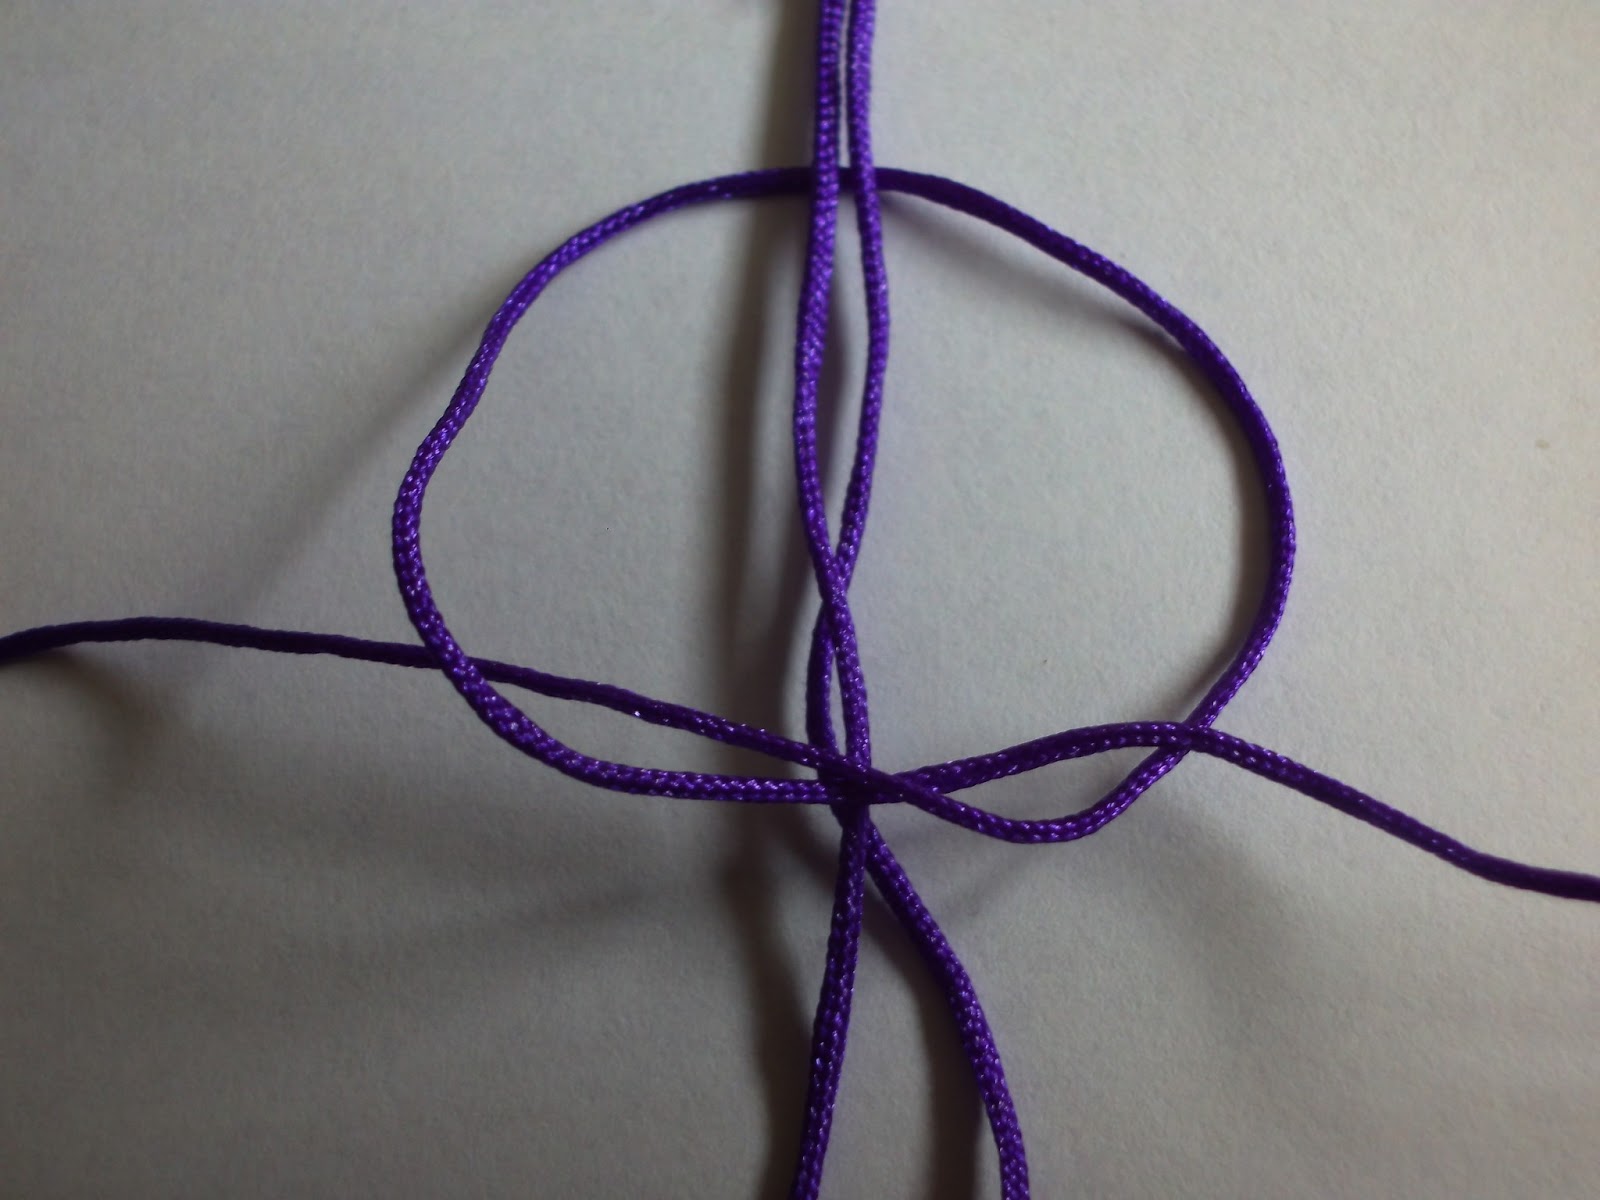
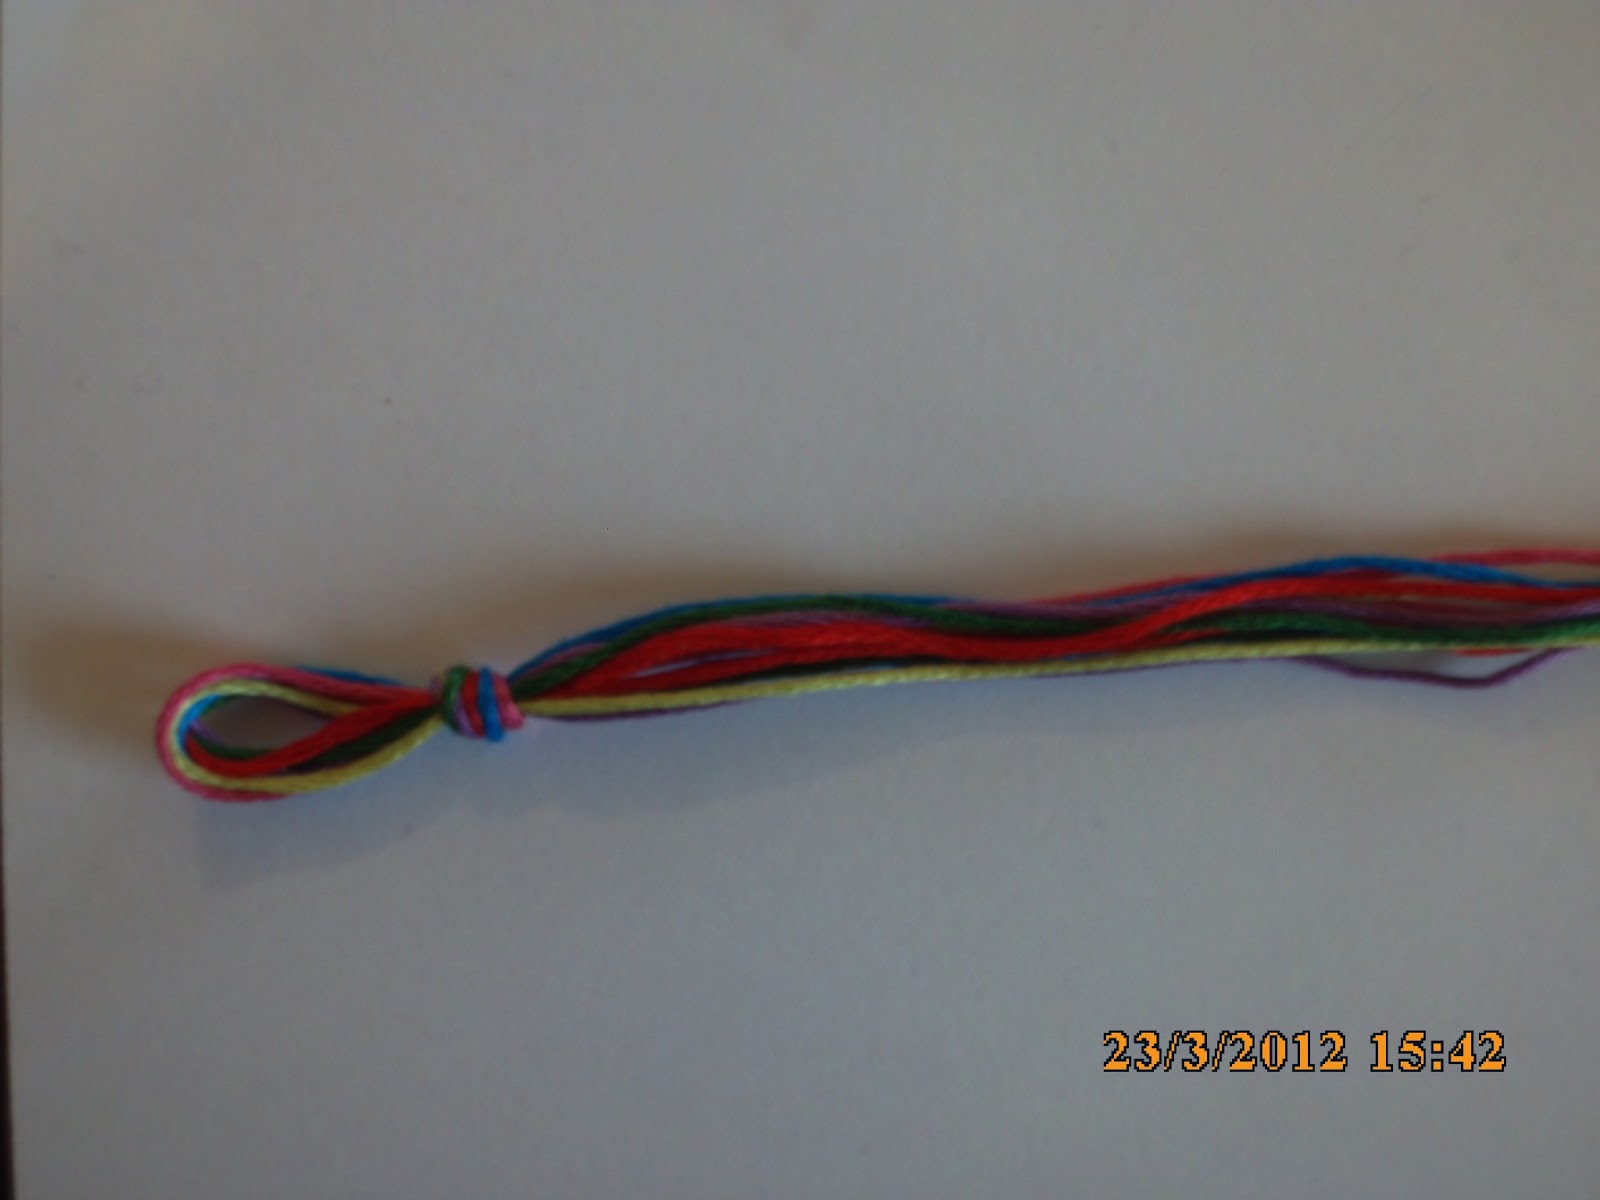
To start you need to cut 4 lengths of each colour measuring 35 inches each. Tie a knot close to the top to hold all the strings together.


Now you need to lay out the colours in the right order. There will be 6 to the left and 6 to the right. In this order the white is the surround of the diamond, the black is the background colour and the green is the diamond colour.


Working with the left 6 stands first take the first (white) strand on the left and knot across until it ends up in the middle. Remember each knot is actually a double knot.


Now working with the right 6 strands take the first (white) strand on the far right and knot across until you reach the middle. Now you knot the two white strands in the middle together to join the sides. You have a chevron now as a start to the pattern.


Left Triangle:

Working with only the left 6 strings take the first strand (black) and double knot across the row. On the final string (white) do one forward knot and one backwards knot so you now have the order from left to right seen in the picture.


You now take the first (black) string  and double knot over the next 2 strands and on the 3rd strand (green) do a forward knot and a backwards knot. You now have this order of strings.


Taking the first strand (white) make a forward and backwards knot over the green string next to it. All the strings are still in the same order now.


Take the 3rd string (black) and do backwards knots towards the left so your order is now black, white, green, green, black and white.


Take the 5th string (black) and do backwards knots towards the left. You should now have the order that is shown in the photo on the right. This is your left triangle done.


Right Triangle:
The right triangle is a mirror image of the left.

Take the first string (black) double knot across doing a backwards and forwards knot on the last string.

Take the first string (black) and knot across the next 2 strings and on the third do a backwards and forwards knot.

Take the first string (white) and make a backwards and forwards knot over the next string.

Take the 3rd string (black) and forward knot to the right.

Take the 5th string (black) and forward knot to the right.


Now join the middle two strings (white).

Take the middle string to the left side and working left knot across until the last string (black) and do a backwards forwards knot.

Take the middle string to the right (white) and knot across to the right until the last string (black) and do a forwards backwards knot.

This is now the start of the surround of the diamond.


Join the two middle strings (green) together.

Take the middle string (green) to the left and knot towards the left over the next 2 strings and on the third make a backwards forwards knot.

Take the middle string (green) to the right and knot towards the right over the next 2 strings and on the third make forwards  backwards knot.


Join the middle strings (green) together.

Take the middle string (green) to the left and knot across the next string to the left.

Take the middle string (green) to the right and knot across the next string to the right.


Join the middle two strings (green).

Take the 4th string in from the left and knot over the next 2 strings towards the middle.

Take the 4th string in from the right and knot over the next 2 strings towards the middle.

Join the middle two strings (green).


Take the second string (white) from the left and knot over each string towards the middle.

Take the second string (white) from the right and knot over each string towards the middle.

Join the middle two strings together (white).


The pattern now continues from the Left Triangle heading above until you have the desired length. Remove the knot at the top of the bracelet and attach the fold over cord ends to either end of the bracelet. See my tutorial for the Diamond Knotted Cord Bracelet for how to attach the fold over cord ends.

Attach your clasp using a jump ring on either end and you are done!

As always I would love to hear if you have found this tutorial helpful and if you have made this bracelet.

Saturday, April 20, 2013

Diamond Knotted Cord Bracelet Tutorial


So here is my tutorial to make this bracelet. 

What You Need:

12mm Lobster Clasp
10mm Jump Ring
2 x 6mm Fold Over Cord Ends
2 x 4mm Jump Rings
1 inch Square Metal Pendant 

1 mm Cotton Cord:
2 x 15 inches
2 x 35 inches


1: Using one of the 15 inch strands of cotton cord loop it through a corner of the square and pull tight. 


2: Taking one of the 35 inch strands, find the middle and place behind the strand already connected.


3: Taking the left strand bring it over the middle strand and over the right strand.


4:  Take the right strand and bring it under the middle strand and out over the front on the left hand loop. Pull the knot all the way to the top of the connected strands. This is the first half of a square knot.


5: Now to do the second half of the square knot. take the left hand strand and place under the middle strands and right strand. 


6: Now take the right side strand and bring it over the middle strands, behind the left strand and pull the knot up. You now have one full square knot. 


7: Continue making square knots for about 3 inches.


8: You now need to do exactly the same on the opposite corner of the square.


9: When you are sure you have the length you want you will be left with four strands on either side like this. 


10: Take the fold over cord end and making sure all four strands and inside bend down the sides until secure using a flat nose pliers. You can now trim off the excess cord. 


11: Using a 4mm jump ring attach the cord end and the lobster clasp. 


12: Finally attach the 10mm jump ring with the other 4mm jump ring to the cord end. 


And Your Done!


Colour Variations:
Use different coloured cotton cord and findings to make this bracelet different every time! Below are a few I made using chain instead of a Square.


Thank you for stopping by to see my tutorial. Let me know in the comments below if you have tried to make this bracelet!

Thursday, April 4, 2013

Diamond Patterned Friendship Bracelet


I have been working on this one for ages. Its not to complicated a pattern and I cant wait to try it out in different colours. I also decided on this one to use a toggle clasp as a closing rather than the traditional plating and tying the ends around my wrist. I like this option as I think its a little more sophisticated and grown up.


I'm really looking forward to wearing this stacked with a few of the other style bracelet like he chevron pattern and the simple four coloured ones from previous posts.

Saturday, March 23, 2013

Chevron Pattern Friendship Bracelet Tutorial

My next in what is becoming a series of friendship bracelet tutorials is a simple chevron patterned bracelet that can be done is so many colour variations they hardly ever look the same.


What You Need:
6x 60 inch strands of embroidery thread in the colours you want to use
Scissors
Tape


1: To start you need to cut your thread to 60 inches and holding them all together fold in half. Then tie knot leaving about an inch loop so now you have double the amount of strands of each colour.


2: I find it best to tape down the loop to my work surface so I can get a good tight knot when Im working the pattern.


3: Next you need to sort out the threads so that you have one of each colour on each side and also get them in order of how you want your colours to appear on the bracelet. You will have six threads on the left and a mirror image of the same six colours on the right. So from the left my pattern is Green, Purple, Red, Blue, Yellow and Pink. You can see below how this is exactly the same coming in from the right.


4: So we are starting with the left side and I find it easier at the start to push the right side strings away so as not to mix any into the pattern. After the first row or two the strings sit in place so this wont be necessary.


 5: So taking the green string bring it across the purple like a number 4.


6: You then bring the green behind the purple and back out in front of the purple.


7: Repeat the knot so you have two green knots on the purple string. And then do this across until you have done two knots on the pink string. The green string will now be last.


8: Now push the 6 left colours aside and we are working on the right six starting out on the right with the green string. Bring the green string over the purple in a backwards looking number 4.


9: Like before bring the green around the purple and back out over the purple string.


10: Again do a double knot and work all the way out towards the pink until you now have the two green strings beside each other in the middle.


11: To join the two sides do a backwards number 4 style knot bringing the right hand string over the left. This is your first row done. The bracelet is continued starting back on the left only now using the purple string and so on until you have reached the length you are happy with. At the end you can just braid the loose string and it can be tied through the loop onto your wrist.


ENJOY!!!

Wednesday, January 16, 2013

Square Knot Tutorial

This tutorial shows you how to do square knots for making macreme bracelets. They are quite simple to do and very repetitive so once you do the knot a few times its easy to do again and again.

I've used 3 different colours in the tutorial just to show where each thread ends up. For the outside pieces of thread you will need about a metre of each and for the middle thread about 11 inches will do.

I have not added beads in this tutorial to this bracelet but adding beads will shorten the length of thread needed but I tend to keep to the same length starting off rather than run out of thread near the end.

I'm using 1mm waxed cotton cord here but you can use a variety of cords and threads in different finishes and colours. It just depends on what look you are going for.


1: Start with your three pieces of thread. 


Tuesday, January 8, 2013

Knotted Cord / Macreme Bracelets

I have made quite a few of these bracelets using varies types of beads and in a lot of different colours. They are very popular at the moment and look great stacked up or mixed with a few other bracelets.

I generally use 100% cotton cord thats comes dyed in a variety of colours and is anywhere from 1mm to 3mm thick. 

I hope to have a tutorial up on how to knot this bracelet very soon so check back or leave a comment below.